Making Discord on Desktop Look Just Right: Display Settings to Ease the Eyes
Locke
April 16, 2026
You may have heard of ways to customize Discord’s style and colors before… things like changing your theme, making your own custom emoji, and all that fun stuff. But if you’re looking for ways to make your conversations more comfy for your eyes, you’ve found the right Discord Blog post!
Here, we’ll be showing off all sorts of toggles, options, and features on Discord’s desktop app to help you view media at your pace rather than right when it’s posted, lowering the strength of colors across the app, and making app content bigger or smaller.
In this article, we’ll be focusing on how these options affect Discord on your gaming desktop, on-the-go laptop, or when you’re quickly popping into chats on the web app. However, many of these options are also available on the mobile app and behave similarly.
Chat Options to Customize Conversations in Discord
Depending on what DMs or channels you’re in, there might be a LOT of pics, random links, and file attachments all over the place. Instead of being blasted with dozens of things at once, you can adjust what’s automatically shown and which items you want to manually open when the time comes.
See Pictures, Videos, or Embeds When You Want To See Them
By default, any pictures or videos sent as files or embedded in-chat will automatically appear the instant they’re posted. If you’re the type to want to only see pics or videos when you’re ready, there’s a few toggles that can help you specify where and when content is shown.
In User Settings > Display > Messages, you’ll see a whole bunch of toggles that ask you when you’d like to see media. These two options are specifically for image and video files:
When posted as links, such as when someone posts a direct link to an image.
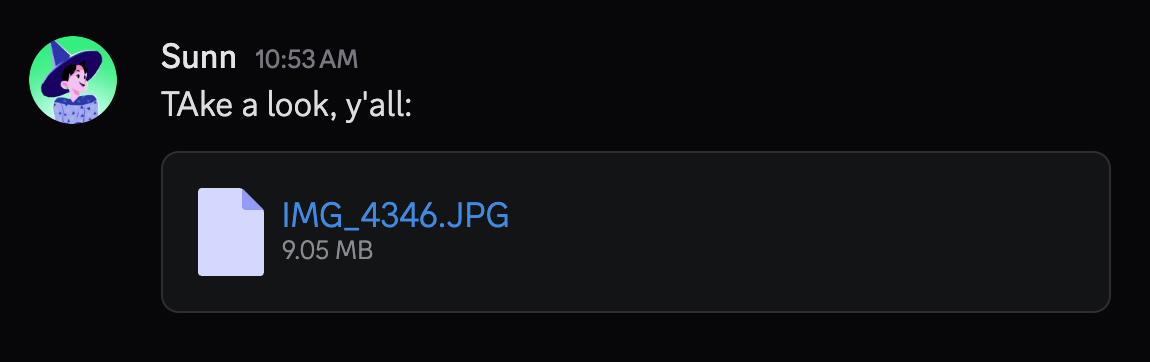
When uploaded directly to Discord, like the example below:
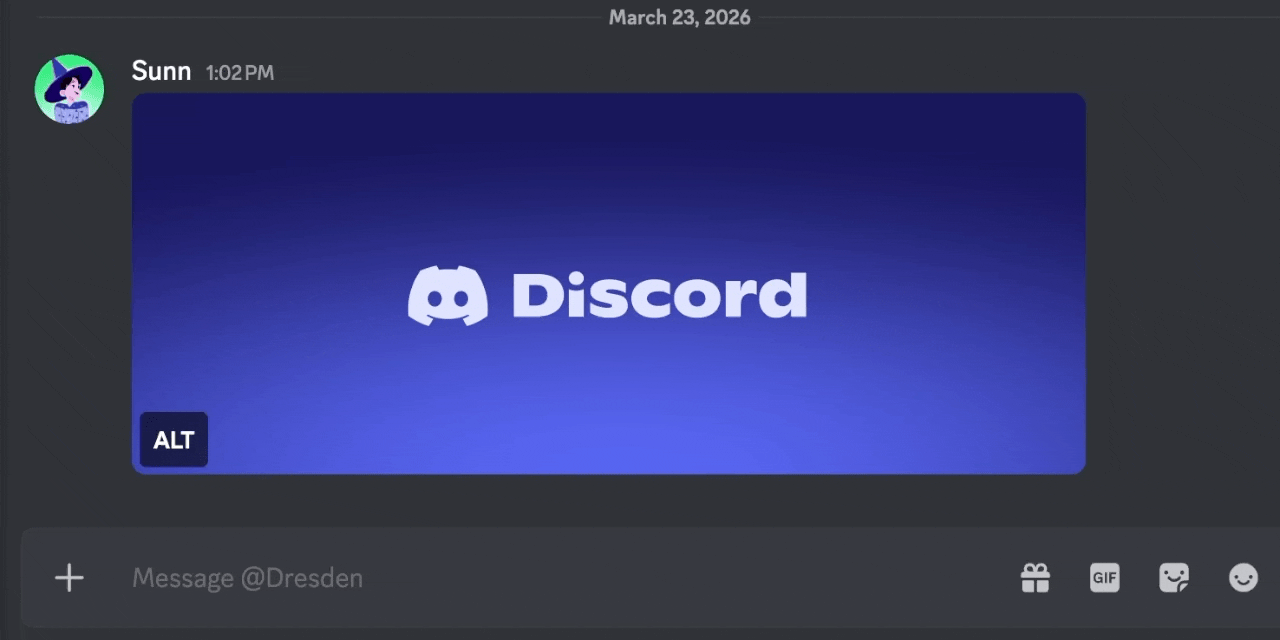
Alongside photos and videos, web links posted to chat can also generate a preview under the post they’re in so you can view without having to go allllllll the way to your web browser. However, if you don’t want them automatically displayed, you can toggle “Show embeds and link previews,” and you can view what’s behind that link whenever you’re in the mood for it.
Show image descriptions by default
You can toggle on an Alt Text button that shows you an image’s description, as long as the poster has taken the time to write one. (Did you know that nearly all in-line pictures on the blog have these?)
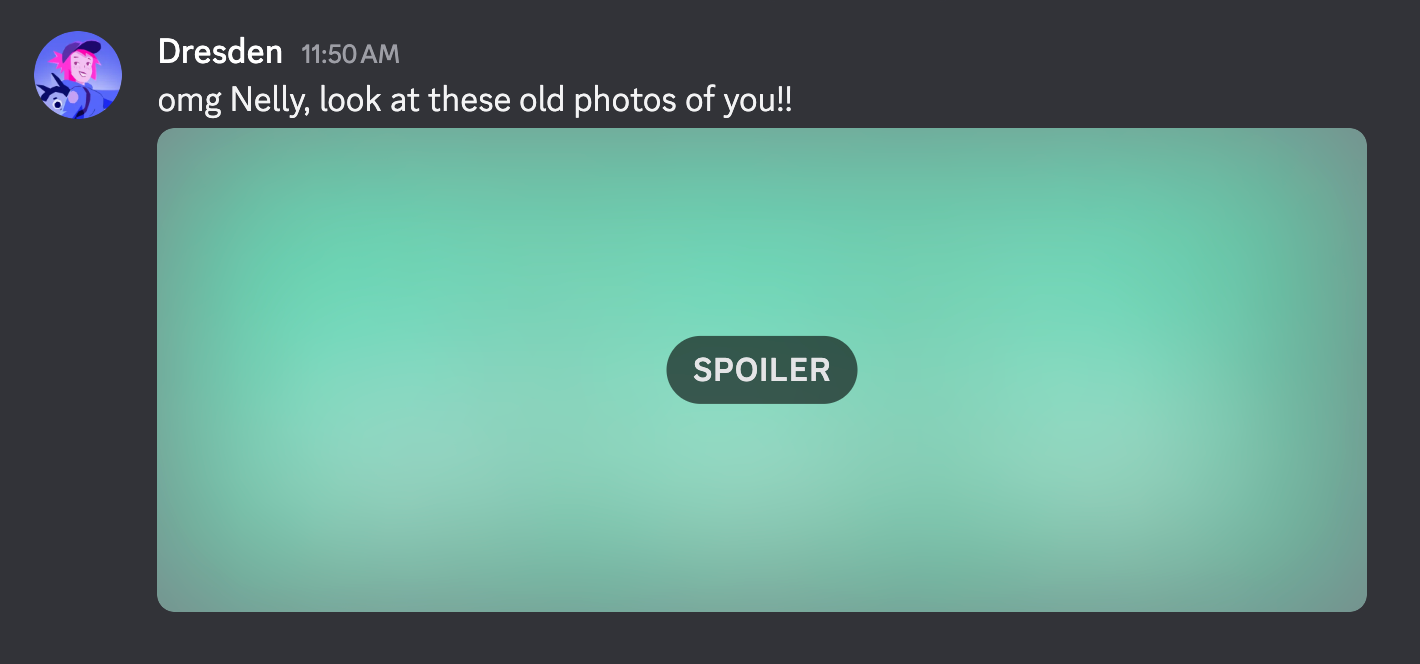
Show Spoilered Content By Default
You live your cinema life on the edge. You absolutely do not care about spoilers. That movie that just came out? Yeah, you already heard the whole synopsis before you went to go see it. You looked up a summary YOURSELF.
You can remove the blurring and have the image shown by adjusting the “Show spoiler content” setting in one of three ways:
On click, which is how it normally works.
Always, which will unspoil every piece of media that’s been hidden by the sender.
On servers I moderate, if you’re running a community server based on that movie series you already saw twenty times.
This option can be especially helpful when combined with lowering the Saturation of the app, since the clickable blue links would no longer be blue. (Or like, a very, very light sky blue.)
Toning Down Discord’s Colors to Ease Your Eyes
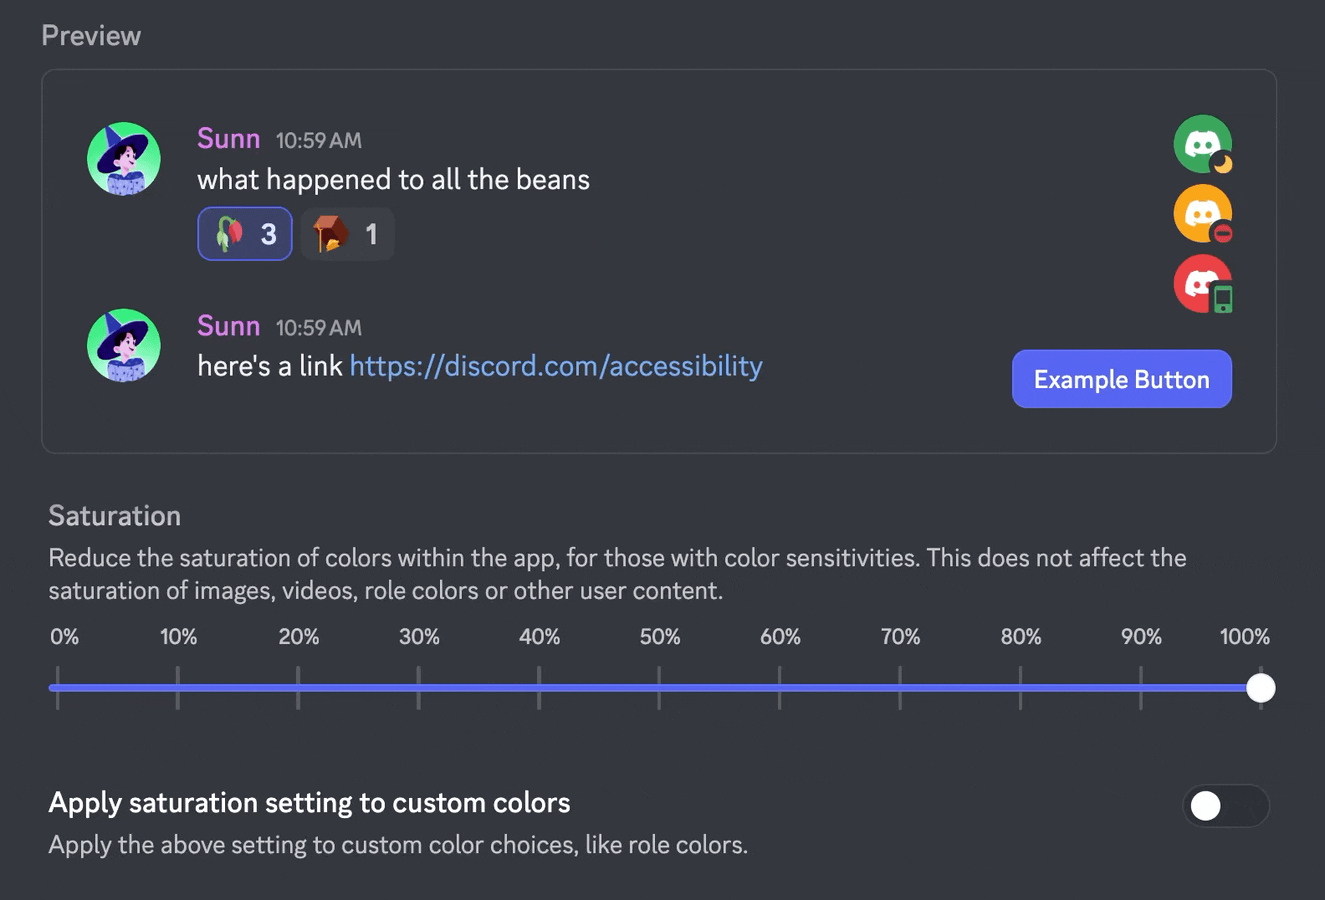
Decrease the Strength of Colors Throughout the App
Tone down the intensity of colors throughout the app by adjusting Saturation! Lowering the Saturation mainly affects Discord’s interface, such as buttons, status indicators, and clickable links.
You can even use “Apply to custom color choices” to have your Saturation choice affect interface colors that others have picked out, like Role Colors!
Keep in mind that user-made content, such as avatars, custom emoji, and uploaded photos or videos won’t have their colors adjusted.
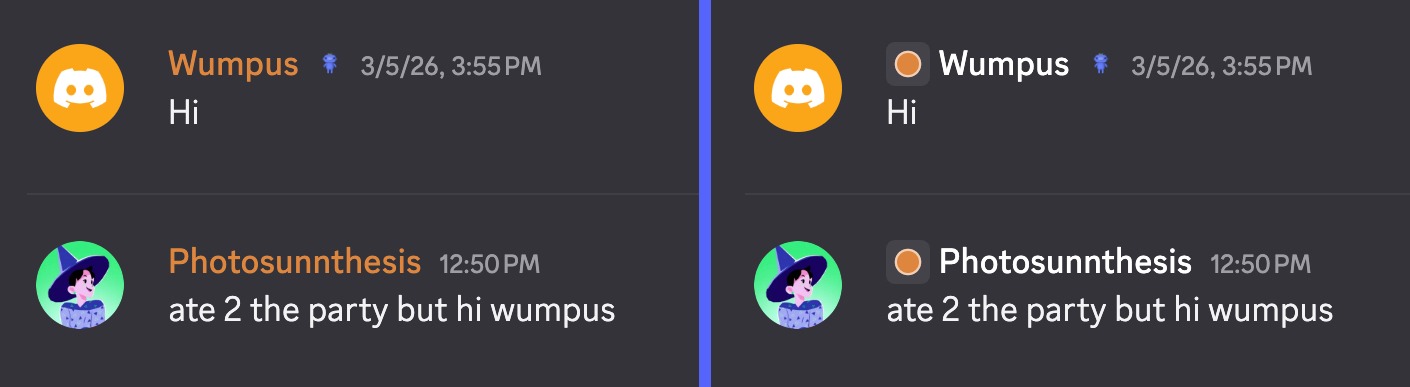
Display Role colors as a dot beside someone’s name
Instead of someone’s entire display name being colored based on a role they have, you can have a role’s color shown on a little dot to the left of their name instead!
This can be especially helpful for servers that happen to use a color for one of their roles that just happens to PERFECTLY match your current app theme’s background. (Please, no more white role colors for us who use Light theme.)
Tone Down High Dynamic Range Content
If you have one of those fancy monitors that supports HDR, you’ve probably seen how eye-piercingly bright those “BEAUTIFUL FOREST WITH GREEN FROGS HDR 8K 120FPS” videos can get.
These sorta images and videos are normally displayed with all their HRD-y brightness on Discord as well. If you’d like to tone down those colors to make them less blindingly bright, you can switch between Full Dynamic Range and Standard Range in Accessibility > High Dynamic Range.
Or you can temporarily blind yourself with a giant HDR sticker. Your call.
Hide Display Name Styles to Keep Names Consistent
Nitro members can change how their display names look, including adjusting the font used, and in certain areas, their colors. Sometimes it’s a small but nice adjustment, while other times they’ve called themselves 𝕷𝖔𝖗𝖉 𝖂𝖚𝖒𝖕𝖚𝖘, 𝕰𝖒𝖇𝖊𝖗 𝖔𝖋 𝖙𝖍𝖊 𝕾𝖊𝖗𝖛𝖊𝖗 𝕾𝖆𝖓𝖈𝖙𝖚𝖒 and their name has a red glow to it.
If you find this sort of customization 𝒹𝒾𝓈𝓉𝓇𝒶𝒸𝓉𝒾𝓃𝑔 and you’d rather see the standard font and colors, there’s actually a toggle in Accessibility -> Text Readability for “Display Name Styles,” letting you disable them if you’d like. Your friends won’t know you’ve disabled it, and you can read 𝕷𝖔𝖗𝖉 𝖂𝖚𝖒𝖕𝖚𝖘’s name again.
Changing Discord’s UI Density and Text Size
Make the UI More (or Less) Dense
Are you someone who likes to see a LOT of information at once? Or do you like things spaced out to differentiate between things a bit better? Or maybe you’re right in the middle of those, perfectly cozy with things as-is.
Compact (left), Default (middle), and Spacious (right) density options.
Adjusting the UI Density will either scrunch up app content closer together or space it out a bit more. This is different than simply zooming in… you can combine a Compact UI Density and Zoomed-Out app to REALLY have your eyes on everything.
Get Rid of Those “Pesky” Avatars
Are you the type of person who just wants to read the message? No big avatars, less message spacing, and no fun as few line breaks as possible? Absolutely ZERO wasted space?
You can adjust how Chat Messages are displayed by picking one of two options: Normally, you can see people’s avatars next to their messages, and their posts have a small gap between them. Alternatively, you can use Compact mode, which forgoes avatars, decreases the amount of spacing between messages, and even starts someone’s message on the same line as their display name.
Diggin’ how Compact Mode shows messages, but still want the personal touch of your friend’s face? (Or anime avatar, or pet pic.) When Compact mode is enabled, the option to “Show user avatars” becomes available in Display -> Messages.
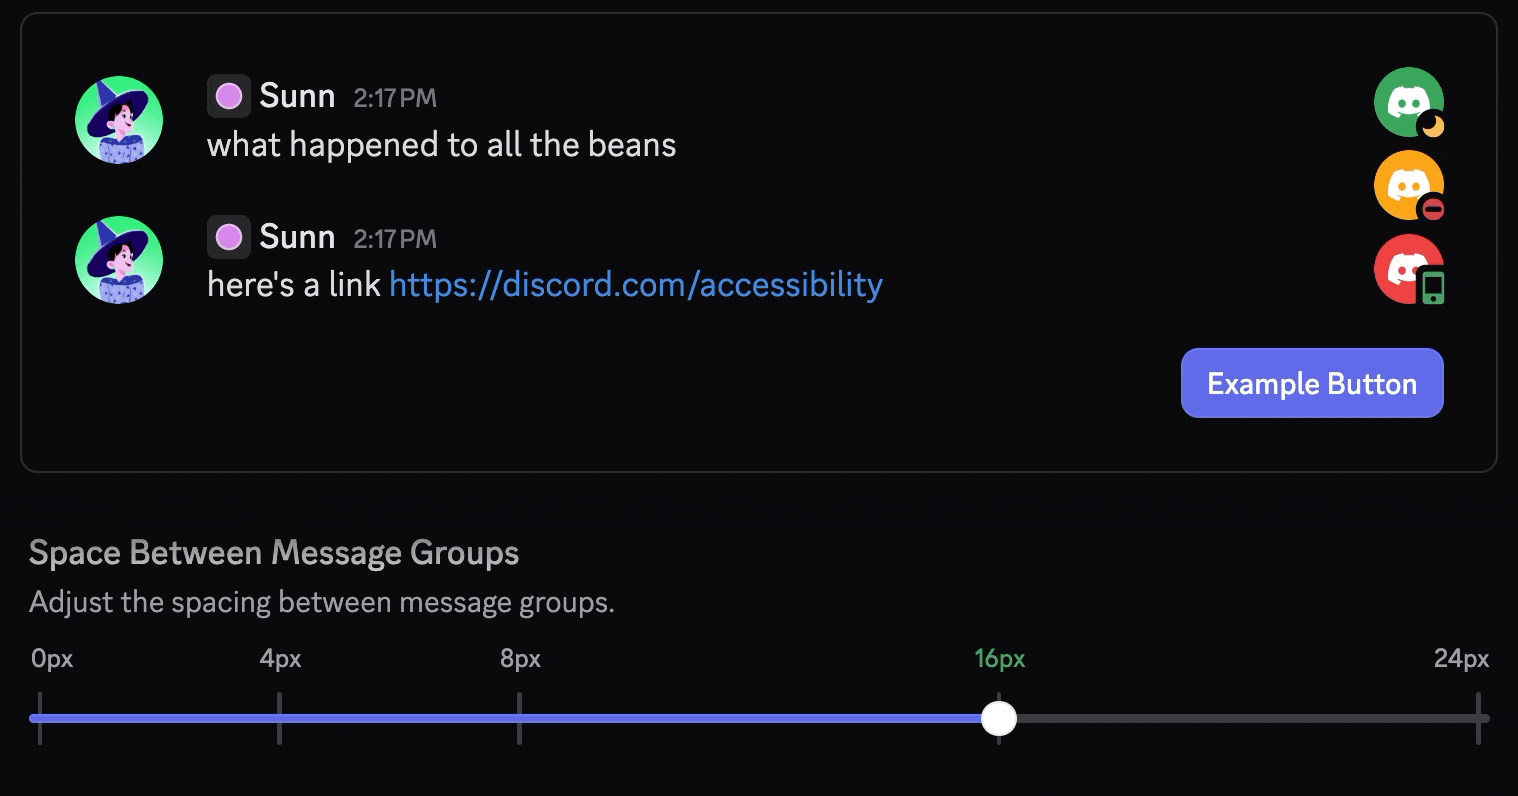
Add Space Between Different People’s Messages
Maybe you DO want that extra spacing between your messages! Or the spacing provided by adjusting the Chat Message Display is not nearly close enough. At some point, you’re gonna need to move your face closer to the monitor if you keep scrunching things together…
Either way, you can add or remove space between individual people’s posts by adjusting the Space Between Message Groups slider. This option can be used in combination with both Default and Compact Chat Message Displays, so you can really space things out or smush it into a tiny space.
One important note: this doesn’t add or remove space between multiple posts in a row from one individual. Instead, it spaces different users apart so you can more easily identify who posted what group of messages.
Zoom In and Out of the App
BIG? Or small. Just like a web browser, you can adjust the zoom level of the entire app, making things really really big or just small enough to read from a distance.
You can also press “CTRL/CMD and -” to decrease the zoom or “CTRL/CMD and +” to increase the zoom without having to go all the way through Settings.
Increase or Decrease the Text Size of Discord
The first thing you see when you open up the Accessibility tab in settings is a “Text size in chat” slider. This can let you make text in Discord bigger or smaller, and that’s separate from making the rest of the app bigger and smaller.
You can combine a (very) large font size with enabling Compact mode and adjusting zoom levels to make your conversations BIG while keeping the rest of the app information-dense.
Speed Through Threads Faster
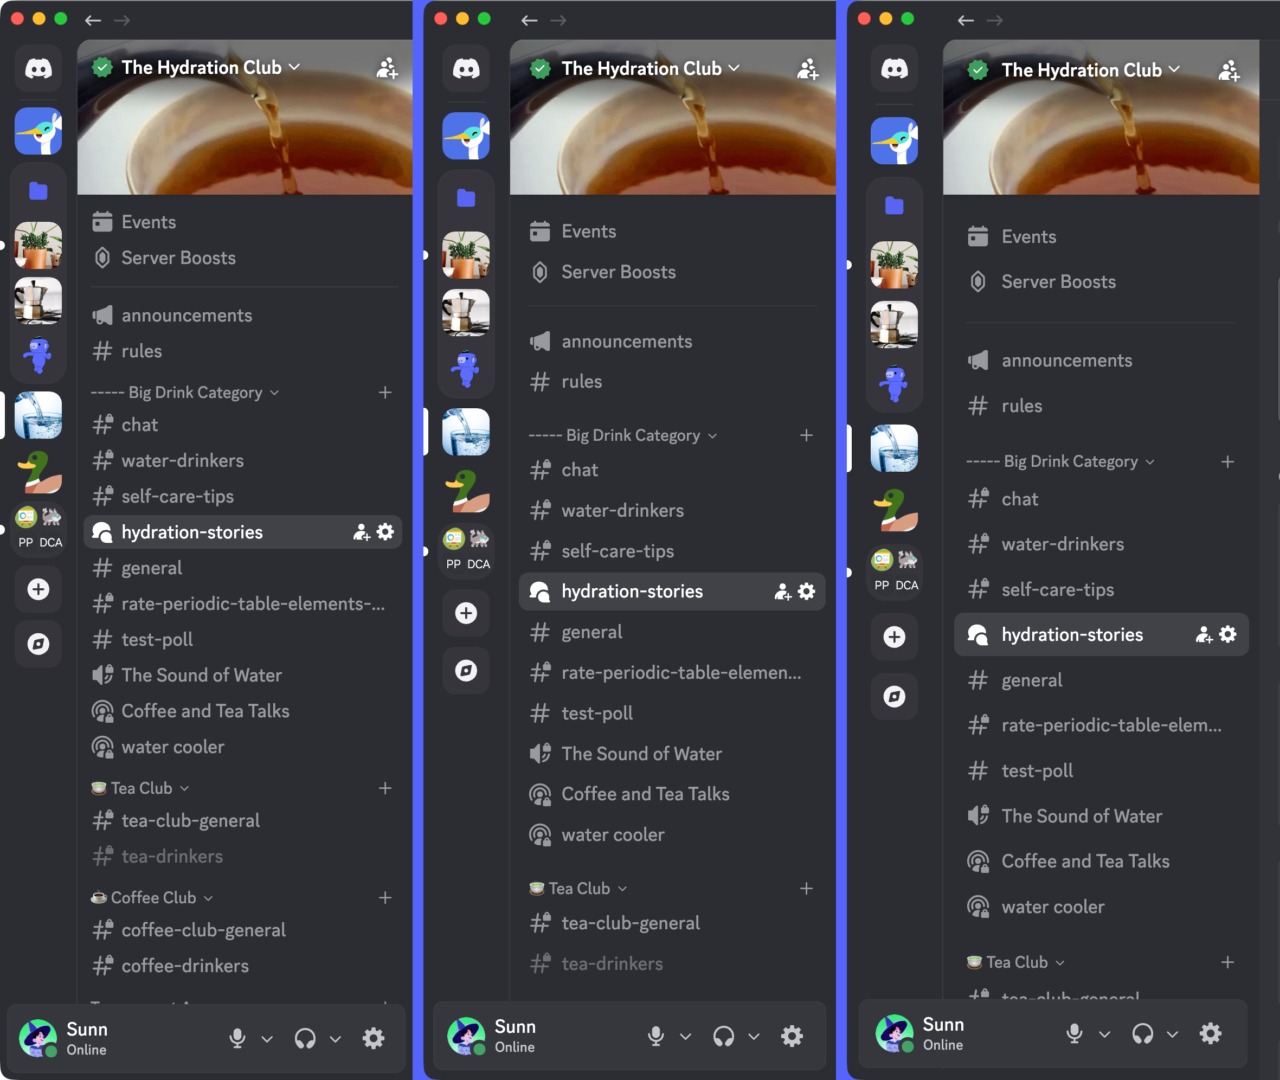
Forum channels are home to many types of conversations on different subjects, usually under one big topic. As time goes on, there’ll likely be a LOT of different Threads being made in ‘em.
Comparison between Split View on and off for Forum channels.
If you’d like to hop between the different Threads contained within a Forum channel quickly, enabling Split View for Threads will pop open threads on the right of the app. When this is disabled, Threads will open up like any other text channel, giving the conversation the entire chat window to breathe.
Now that you’ve got your conversations being shown exactly how you want ‘em, now’s a good time to take a peek at allll the other stuff you can customize. We’ve got articles about customizing profiles, changing your theme, making emoji, and even formatting your messages better!
Locke's years of experience throughout the universe make him the most knowledgeable person to teach you about All Things Discord. Has a soft spot for Nutella and jack cheese sandwiches.


.png)
.png)


Nameplates_BlogBanner_AB_FINAL_V1.png)

_Blog_Banner_Static_Final_1800x720.png)


_MKT_01_Blog%20Banner_Full.jpg)


.png)


